


- A weightlifting belt works by giving your braced core something rigid to push against, amplifying intra-abdominal pressure rather than supporting your spine passively.
- Correct belt placement is below the ribcage and above the hip bones, centred on the soft tissue zone of the midsection.
- The Valsalva manoeuvre, a full diaphragmatic breath held against a closed glottis, is the breathing technique that maximises IAP during a lift.
- A belt should be used on near-maximal sets, not every warm-up, to preserve core strength development.
- Leather belts require a break-in period of a few sessions before they conform fully to your midsection shape.
- Both lever belts and prong belts are effective. The choice depends on preference for convenience versus adjustability.
- 1. What a Weightlifting Belt Actually Does
- 2. How Intra-Abdominal Pressure Works
- 3. Types of Weightlifting Belts Compared
- 4. Which Lifts Benefit Most From a Belt
- 5. How to Position the Belt on Your Body
- 6. The Breathing Technique: Step by Step
- 7. Common Belt Mistakes and How to Fix Them
- 8. How to Break In a New Leather Belt
- 9. Advanced Belt Strategy for Competitive Lifters
- 10. Who Uses Weightlifting Belts
- 11. Related Reading
- 12. Frequently Asked Questions
A weightlifting belt is one of the most misunderstood pieces of gym equipment in any training bag. Walk into any gym in India and you will see belts worn too low, too loose, and on sets where they provide no mechanical benefit at all. The misuse is so common that many lifters never unlock the actual performance advantage a belt offers. If you are serious about squats, deadlifts, or overhead pressing, understanding the mechanics behind correct belt use will directly translate into heavier lifts and a healthier spine. You can explore the full range of weightlifting belts at Hack Athletics once you understand what you are selecting for.
Hack Athletics was founded on the principle that Indian lifters deserve access to competition-grade equipment with honest guidance behind it. Every belt in our range is built to the standards referenced by the International Powerlifting Federation, meaning the gear that elite athletes use is the same gear available to you. You can read more about our approach on the Hack Athletics about page.
Last reviewed: May 2026
1. What a Weightlifting Belt Actually Does
The single most persistent myth about weightlifting belts is that they support the lower back the way a back brace does after injury. They do not. A belt is not a passive support device. It is a tool that gives your already-contracted core muscles a rigid surface to push against, which amplifies the internal pressure your body generates during a heavy lift.
When you brace your core without a belt, the pressure you generate is limited by how much outward tension your abdominal wall can maintain on its own. When you add a belt and brace into it with the same effort, the belt acts as the fourth wall of a pressure chamber. Your anterior core pushes forward into the belt, your posterior muscles push back, and your obliques push sideways. The result is a significant increase in intra-abdominal pressure compared to beltless lifting at the same effort level.
Research finding: Studies published in peer-reviewed sports science literature, including research cited by the National Strength and Conditioning Association, indicate that a correctly used lifting belt can increase intra-abdominal pressure by 25 to 40 percent compared to beltless lifting, depending on belt thickness, position, and bracing quality.
This elevated pressure creates a hydraulic effect around the lumbar spine, reducing the compressive and shear forces on the intervertebral discs during a heavy load. The spine becomes a more rigid column, and the muscles responsible for spinal extension can direct more force into moving the barbell rather than stabilising the vertebrae.
2. How Intra-Abdominal Pressure Works
Intra-abdominal pressure (IAP) is the force exerted by the contents of the abdominal cavity on the walls that surround it. The abdominal cavity is bounded by the diaphragm at the top, the pelvic floor at the bottom, and the abdominal and back muscles on all sides. When you inhale deeply and contract all of these walls simultaneously, IAP rises sharply.
The Valsalva Manoeuvre
The technique used by competitive powerlifters to maximise IAP is called the Valsalva manoeuvre. It involves taking a full breath into the belly (not the chest), then closing the glottis, the valve in the throat, and bearing down as if you were about to lift something very heavy. This locks the air inside the abdominal cavity and allows you to generate maximum pressure before and during the lift.
The Valsalva manoeuvre causes a brief spike in blood pressure. For healthy, trained individuals performing maximal efforts, this is a normal physiological response. Individuals with cardiovascular conditions should consult a physician before using this technique regularly.
In practice, the sequence is: position yourself under the bar, set your brace while you are still standing, take your breath, descend, and hold the breath through the sticking point of the lift. Release air at the top of a squat or deadlift lockout, never at the bottom or mid-rep. Releasing pressure mid-lift is one of the most common technical errors competitive coaches observe.
3. Types of Weightlifting Belts Compared
Not every belt is built for the same purpose. The thickness, material, width, and fastening mechanism all affect how the belt performs and which type of lifting it suits best.
| Belt Type | Thickness | Fastening | Best For | Adjustability |
|---|---|---|---|---|
| 13mm Lever Belt | 13mm leather | Hinged lever | Powerlifting, maximal deadlifts and squats | Fixed per session, requires screwdriver to resize |
| 10mm Lever Belt | 10mm leather | Hinged lever | Intermediate to advanced strength training | Fixed per session, more flexible than 13mm |
| 7mm Prong Belt | 7mm leather | Single or double prong | General strength training, versatile use | Fine adjustment hole by hole |
| Quick Locking Belt | Varies | Ratchet or velcro | CrossFit, functional fitness, gym-goers | Continuous micro-adjustment |
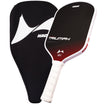
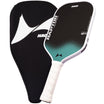
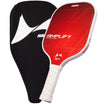
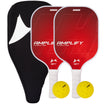
The Hack Athletics 13mm Lever Belt is built for maximum rigidity and is the choice of competitive powerlifters. The 10mm Lever Belt offers a slightly more forgiving feel while still delivering excellent support. For those who prefer a traditional prong fastening, the 7mm Prong Belt is versatile for both strength training and bodybuilding sessions.
4. Which Lifts Benefit Most From a Belt
Primary Lifts for Belt Use
The barbell back squat is the lift where most lifters first notice a meaningful difference with a belt. Because the load sits on the upper back and the spine must remain upright against significant forward torque at the bottom of the squat, IAP directly governs the ability to maintain position. A belt amplifies that pressure and allows heavier loads to be handled with better mechanics.
The conventional and sumo deadlift are equally suited to belt use. The initial pull from the floor demands enormous spinal rigidity, and a belt gives the lumbar region a pressure reservoir to draw from during that first 10 to 15 centimetres of the pull, which is where most technical breakdowns occur.
Practical observation: Among competitive powerlifters surveyed in training logs published by federation coaches, over 90 percent use a belt for all competition-level squat and deadlift attempts, and roughly 60 percent use a belt for the bench press during accessory pressing work.
Secondary and Accessory Lifts
The overhead press and barbell row benefit from belt use at heavier loads because both movements demand active lumbar stability. The Romanian deadlift, good morning, and barbell hip thrust also benefit. Isolation exercises such as bicep curls, leg press, and machine work do not require a belt and wearing one for these movements provides no mechanical advantage.
Ready to Lift With a Belt That Matches Your Ambition?
Hack Athletics lever and prong belts are handcrafted from premium leather and built to IPF standards. Free shipping across India on every order.
Shop Weightlifting Belts5. How to Position the Belt on Your Body
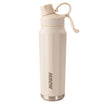
Correct belt position is non-negotiable. A belt worn in the wrong location cannot do its job regardless of how well you brace or how good the belt itself is. There are two common positioning errors: too high and too low.
The Correct Position
Place the belt directly below your lowest rib and above the top of your hip bones. The centre of the belt should sit on the soft tissue of your midsection, not on bone. This zone is where your abdominal wall has the maximum capacity to expand outward into the belt when you brace. Measure roughly three to four finger-widths below the last floating rib: that is your target zone.
The Two Common Positioning Errors
Wearing the belt too high, up into the ribcage, restricts breathing and prevents the diaphragm from descending fully. You will feel compressed and restricted rather than supported. Wearing the belt too low, down onto the hip crests, means the belt is sitting on bone rather than soft tissue. In this position it cannot amplify IAP because there is no tissue left to expand outward. Many gym-goers in India wear the belt like a low-slung fashion accessory: centred on the hips or even below. This is purely cosmetic and provides no performance benefit.
Use the Hack Athletics size chart to select the correct belt size. Measure your midsection around your belly button, not your trouser waist size. Belt sizes are based on the circumference of the midsection in the braced position.
6. The Breathing Technique: Step by Step
The breathing sequence is where most recreational lifters leave performance on the platform. Even with a correctly positioned, correctly sized belt, poor breathing mechanics eliminate much of the benefit. Here is the step-by-step process used by elite powerlifters:
Step 1: Set Your Starting Position
Before you unrack or approach the bar, take your stance and position your body as if the weight were already on you. Posture first, weight second.
Step 2: Breathe Into Your Belly, Not Your Chest
Draw air deep into your diaphragm. Your stomach should visibly expand outward. Your chest should rise only minimally. This is a diaphragmatic breath, and it fills the abdominal cavity rather than the chest cavity.
Step 3: Brace 360 Degrees
Once your lungs are full, contract your entire core as if you are about to take a punch to the stomach. Your abs, obliques, and lower back muscles should all engage simultaneously, pushing outward in every direction into the belt.
Step 4: Close the Valve and Hold
Close your glottis by holding your breath against a closed throat. This is the Valsalva. The pressure is now locked in the cavity. Begin the lift.
Step 5: Hold Through the Sticking Point
Maintain the held breath through the most demanding portion of the movement. For a squat this is the bottom to just above parallel. For a deadlift this is the floor pull to knee height. Do not exhale until you have cleared the sticking point.
Step 6: Release at Lockout
At the top of the movement or just before reracking, release the breath with a controlled exhale. Reset your brace before the next repetition if you are performing multiple reps.
7. Common Belt Mistakes and How to Fix Them
Wearing the Belt Too Tight
A belt so tight you cannot take a full breath defeats the purpose entirely. You need space for the midsection to expand into the belt. If you cannot feel any outward pressure from your core against the belt during the brace, you cannot benefit from the IAP amplification. Fasten the belt firm but not suffocating.
Relying on the Belt Instead of Bracing
The belt does not replace your muscular brace. Lifters who strap on a belt and then relax their core expecting the belt to hold them together will be disappointed and potentially injured. The belt is a tool for amplifying an already strong muscular brace, not a substitute for it.
Using a belt as a substitute for core bracing is the most dangerous mistake a lifter can make. The belt provides resistance for your muscles to push against. If those muscles are not engaging, the belt is simply a piece of leather around your waist with no mechanical function.
Using a Belt on Every Single Set
Wearing a belt for warm-up sets at 60 percent of maximum continuously reduces the training stimulus your stabilising muscles receive. Reserve belt use for sets at or above 80 to 85 percent of your one-rep maximum, or for any set where maintaining spinal position under fatigue is genuinely challenging. Train your core beltless on lighter work.
Incorrect Sizing
A belt that is too long will have too much excess leather at the buckle end, creating bulk and making consistent positioning across sessions unreliable. A belt that is too short cannot close properly. Measure correctly and refer to the official sizing guide before purchasing.
8. How to Break In a New Leather Belt
A new leather weightlifting belt will feel stiff and unyielding in the first few sessions. This is normal and expected for a quality leather product. The break-in process takes between three and six training sessions, after which the belt will have conformed to your midsection and the leather will have softened to a point where positioning feels natural.
The Break-In Process
Gently roll the belt back and forth across your hands before each session during the first two weeks. Do not roll tightly enough to crease the leather sharply. Wear the belt on your working sets and allow body heat and pressure to do the rest. Avoid soaking in water, applying heat with a hair dryer, or using oil-based conditioners unless specifically recommended for the leather type on your belt.
After several sessions you will notice the leather feels more supple around the mid-section and the edges feel less sharp against the skin. At this point the belt has broken in and will maintain its shape and support across its entire lifespan with proper care.
9. Advanced Belt Strategy for Competitive Lifters
For competitive powerlifters preparing for a federation meet, belt strategy goes beyond simply wearing the belt on heavy sets. Federation rules govern maximum belt width, and the International Powerlifting Federation specifies a maximum belt width of 10 centimetres at any point. Hack Athletics belts are built to these standards, making them eligible for use in IPF-affiliated meets in India, including those organised under International Powerlifting Federation guidelines.
Timing Belt Use in a Peaking Cycle
During a peaking cycle, lifters typically introduce the belt consistently at the 8-week mark before competition. This gives enough time to dial in positioning, tightness, and breathing mechanics so that on competition day nothing feels unfamiliar. Changing your belt tightness or position the week before a meet is a common and avoidable mistake.
Competition tip: At sanctioned powerlifting meets, you may be required to present your belt for inspection before lifting. Ensure your belt meets the width specifications of your federation and that all hardware is in good condition and free from modifications.
Research from the National Strength and Conditioning Association suggests that consistent intra-set bracing practice with a belt at intensities above 85 percent of one-rep maximum produces measurable improvements in technical consistency across competition movements. The belt becomes part of the motor pattern, not an afterthought.
10. Who Uses Weightlifting Belts
Weightlifting belts are used across a wider range of athletes and training goals than most people assume. Understanding who benefits from belt use helps you determine where a belt fits in your own programme.
- A weightlifting belt amplifies intra-abdominal pressure by giving your braced core a rigid surface to push against. It is not a passive back support device.
- Correct position is below the ribcage and above the hip bones, on the soft tissue zone of the midsection.
- The Valsalva manoeuvre, a full diaphragmatic breath held against a closed glottis, is the breathing technique that creates maximum IAP.
- Use the belt on sets at or above 80 percent of your maximum. Train without it on lighter work to build core strength.
- Break in a new leather belt over three to six sessions to let the leather conform to your midsection.
- Competition lifters should confirm their belt meets the width rules of their federation before a meet.
- Correct sizing matters: measure around your belly button, not your trouser size.
11. Related Reading
12. Frequently Asked Questions
Should I breathe in or out before lifting with a belt?
Breathe in deeply before initiating the lift. Take a full diaphragmatic breath, brace hard against the belt, then hold that pressure through the sticking point. Only exhale after you have locked out or passed the most demanding part of the movement.
How tight should a weightlifting belt be?
The belt should be tight enough that you can still take a full breath and expand your midsection into it, but firm enough that there is clear resistance when you brace. A useful rule: if you can slide two fingers under the belt at rest, the tightness is in the right range. If you cannot breathe at all with it fastened, it is too tight.
Where should I position my weightlifting belt on my body?
Position the belt directly below your ribcage and above your hip bones, centred on the soft tissue zone of your midsection. This placement allows your abdominal wall to expand forward, backward, and laterally against the belt when you brace, which is what generates intra-abdominal pressure. Avoid placing it too high on the ribs or too low on the hips.
Can beginners use a weightlifting belt?
Beginners can use a belt, but it is more effective once you have developed baseline bracing habits and technique. Most coaches recommend training without a belt for the first several months to build core awareness, then introducing a belt at higher working weights. A belt supplements good technique rather than replacing it.
Does wearing a belt weaken your core over time?
Research does not support the idea that belt use weakens the core if the belt is used appropriately. Wearing a belt on every set, including warm-ups with light loads, reduces the demand on your stabilising muscles. Reserve belt use for near-maximal and maximal effort sets and continue training without a belt on lighter work to maintain core strength.
What is the difference between a lever belt and a prong belt?
A lever belt uses a hinged metal mechanism that clicks shut for a very consistent, repeatable tightness. A prong belt uses one or two metal prongs through holes in the leather, similar to a standard trouser belt. Lever belts are faster to put on and remove between sets, while prong belts allow finer incremental adjustments in tightness. Browse both options in the Hack Athletics belt collection.
How do I break in a new leather weightlifting belt?
Roll the belt back and forth gently in your hands before your first few sessions to begin softening the leather. Use it on your working sets across several workouts and the leather will conform to your midsection naturally. Avoid soaking the belt in water or applying heat, as both can damage the material.
Which lifts benefit most from a weightlifting belt?
The squat and deadlift benefit most because they demand the highest levels of spinal stabilisation under load. The overhead press and barbell row also benefit at heavier weights. Isolation exercises such as bicep curls or leg extensions do not require a belt.